Do you want to learn how to draw a watermelon in a simple way? This step-by-step guide will help you draw a full watermelon using easy shapes and lines. Even if you’re just starting out, you can follow these steps and draw your own watermelon without any trouble. Let’s begin slowly and build it up one part at a time.
Learn to draw watermelon
Step 1: Draw a Round Shape
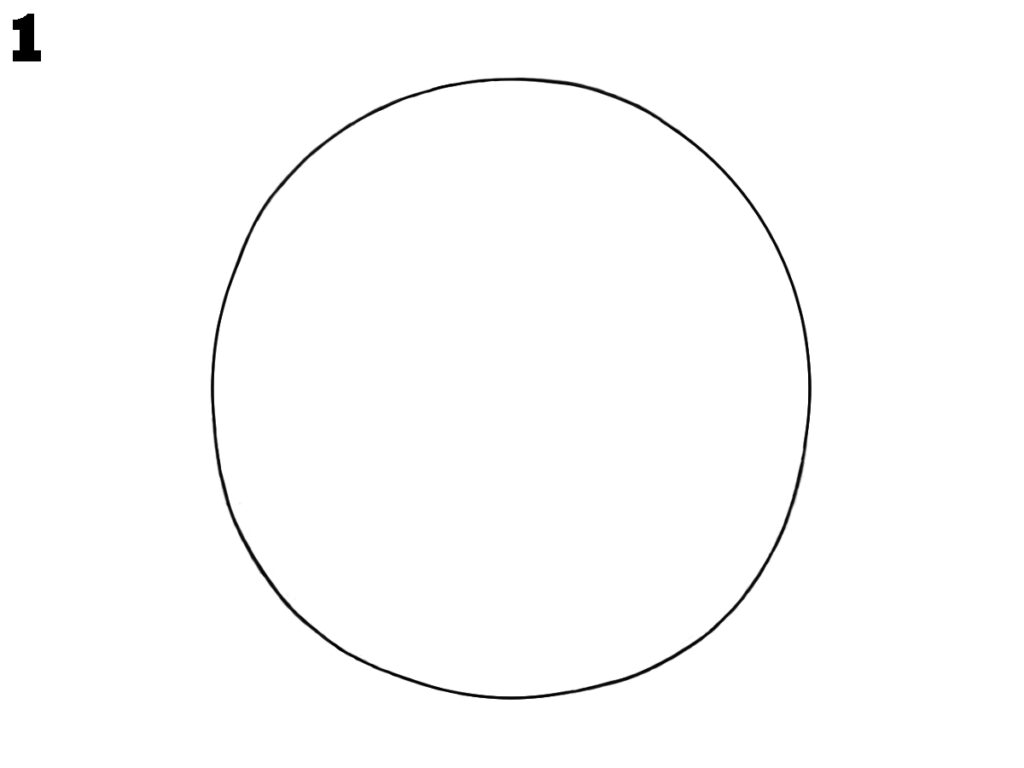
Begin by drawing a large circle on your paper. This circle will be the base shape for your watermelon. Try to make the shape even and smooth, but don’t worry if it’s not perfect. A slightly wobbly circle still looks natural. Keep enough space around it so you can add more details in the next steps.
Step 2: Add the Stem on Top

Now, draw a small curly stem on the top middle part of the circle. This stem is where the watermelon was connected to the plant. Just make a small loop with a tiny tail to one side. It should look simple and sit gently above the circle without changing its shape.
Step 3: Sketch the Vertical Stripes
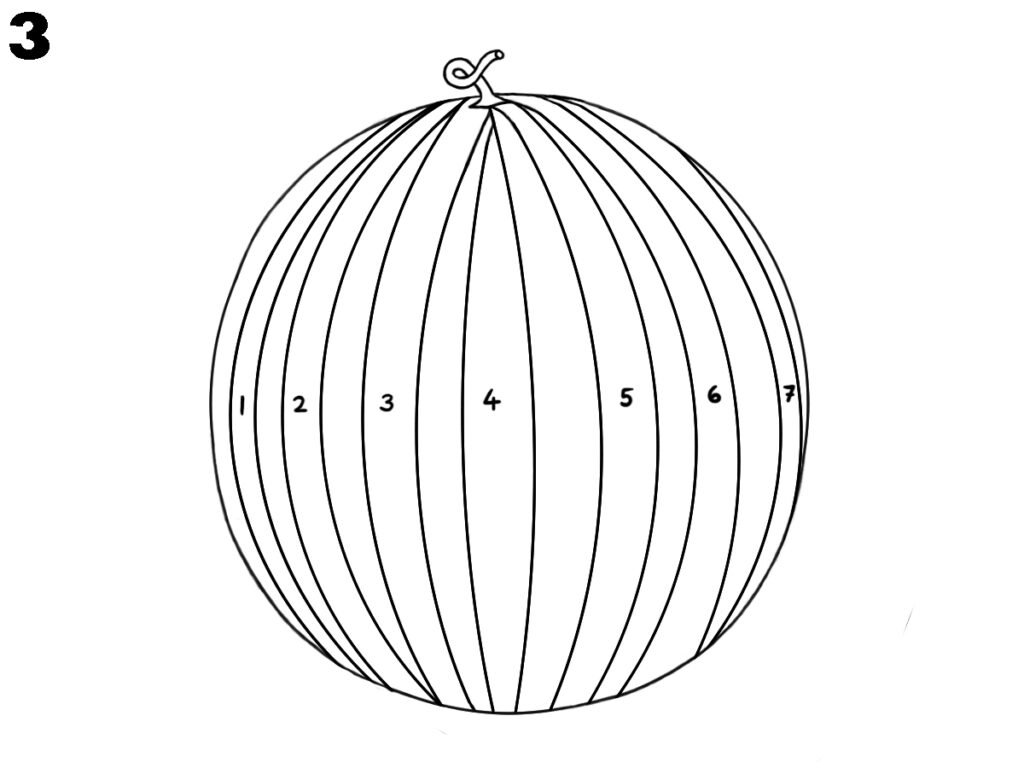
Next, draw long curved lines starting from the top of the watermelon down to the bottom. These lines should follow the shape of the circle and spread evenly around it. This will help show the natural pattern that watermelons have. Make sure not to draw them too close together or too far apart.
Step 4: Make the Lines Wavy
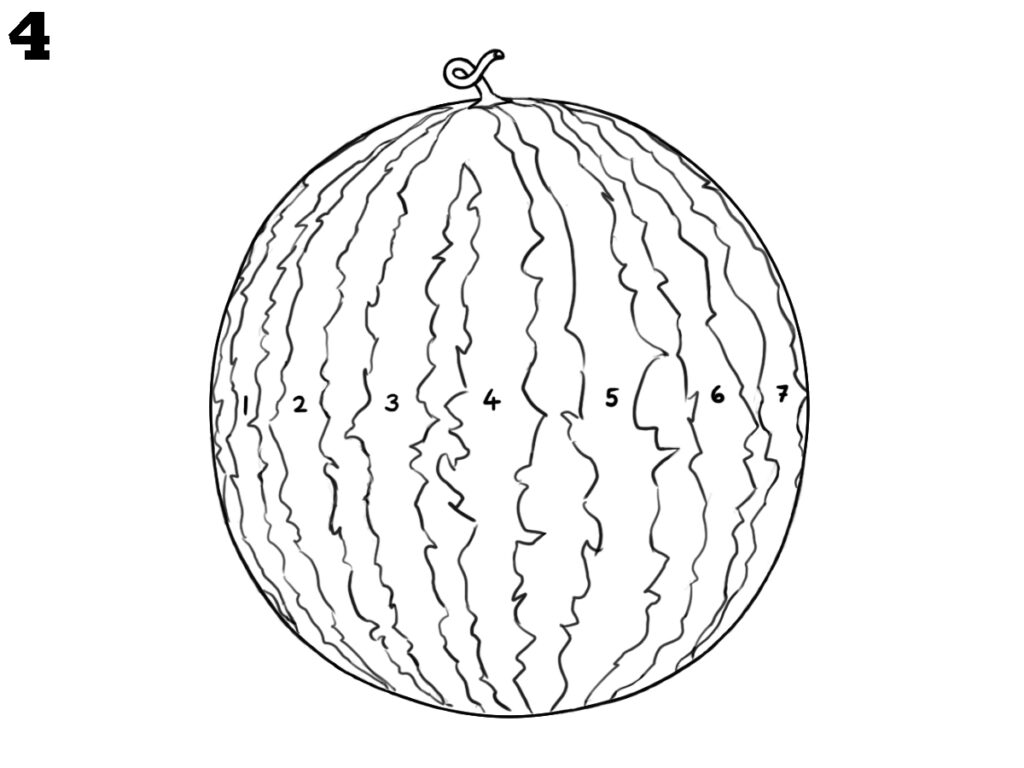
Now, go over the straight lines you made and turn them into soft, wavy lines. These wavy lines help the drawing look more real, like the marks on a real watermelon. Don’t make the waves too sharp—keep them light and smooth. Try to follow the path of each line while changing its shape slightly.
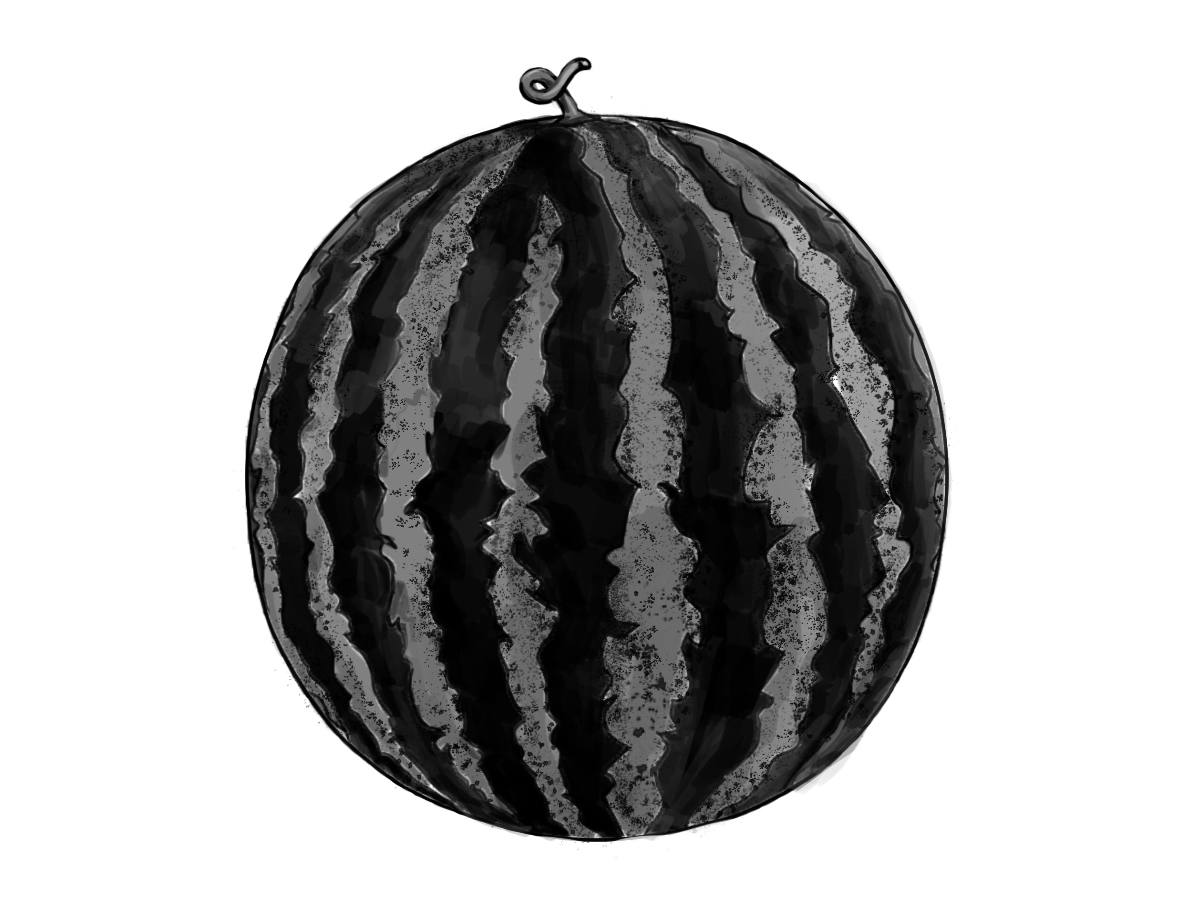
Step 5: Fill in the Dark Stripes

Start filling in every other space between the wavy lines with a dark color. Leave the next space blank to keep the light areas in between. This gives the watermelon its striped look. Fill carefully so the edges stay inside the lines, and let the lighter areas stay plain for now.
Step 6: Shade and Add Final Touches
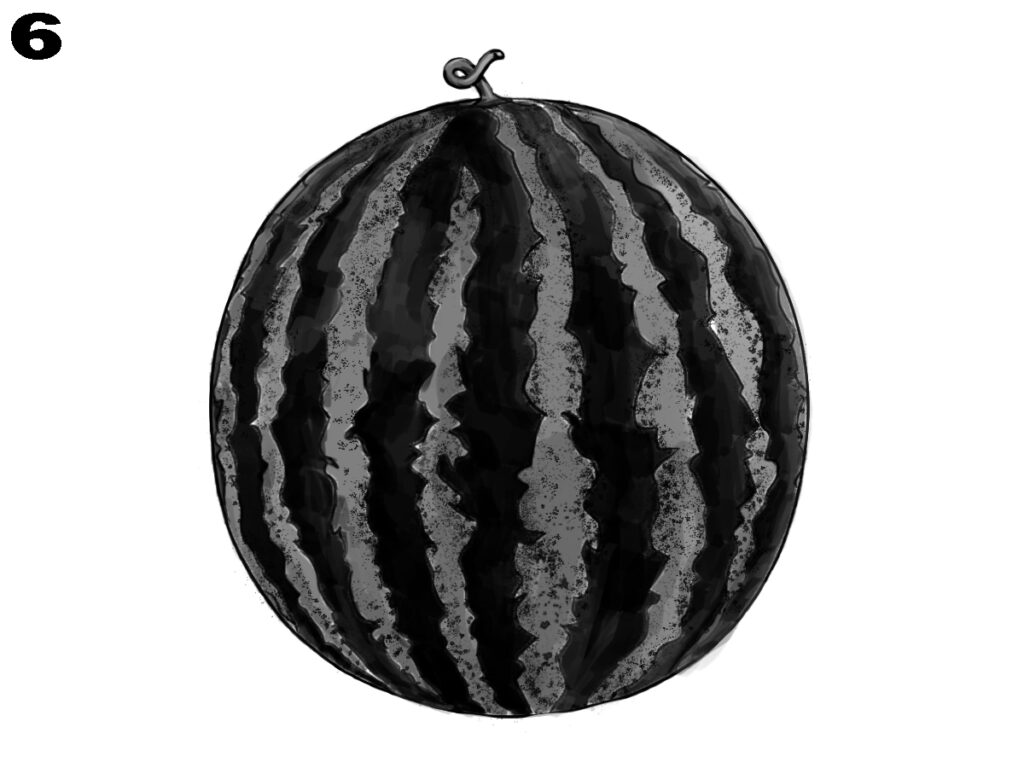
In the last step, gently add shading to the lighter stripes. Use a softer color than the dark ones to show light and shadow. You can also shade a little near the bottom and sides to show roundness. Once you’re done, check all parts and fix any lines if needed to complete your watermelon drawing.
Conclusion
Now you’ve finished drawing a full watermelon with simple lines and shapes. Each step helped add more detail, and your picture now looks just like a real one. Keep practicing these steps to get better at drawing fruits. This method makes it easy for anyone to learn and enjoy drawing.


